In my newsletter last month, I mentioned plans to experiment with painting on photos. How has it gone so far? The short answer is: slowly, but I’ve learned a lot already!
Getting Photo Prints
The first hurdle was deciding where to get my photographs printed. I got help from a professional photographer, who has become a casual mentor. [Note: If you’re considering looking for a mentor or mentee, check out this excellent podcast “The Photo Mentor and Mentorship.”] When I mentioned wanting to find a high-quality photo printing company, he recommended White Wall. A superlative suggestion, White Wall has won numerous TIPA awards, are considered a global leader, and conveniently for me, have operations in Germany.
White Wall offers photo printing on a myriad of paper and canvas surfaces. They also print photos on aluminum and wood substrates, among other things.
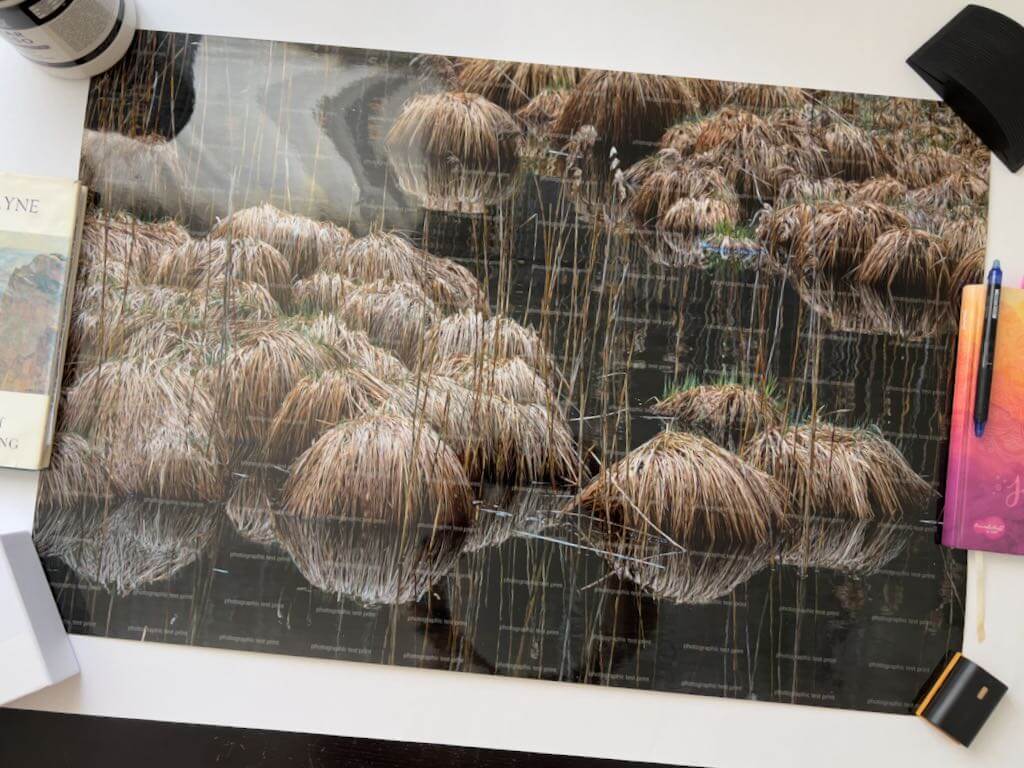
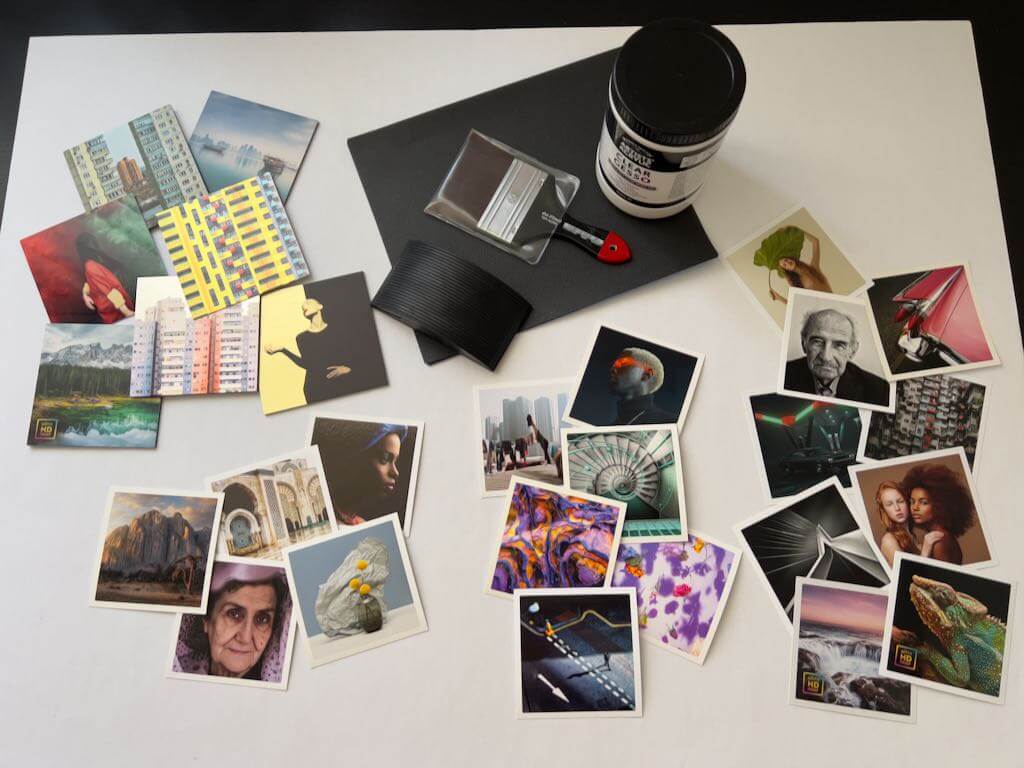
For my paintings, I am interested in working on larger, fine art giclée photo prints, mounted on a hard and durable surface, that I can frame directly. I ordered samples from White Wall to play with: the “Prints and Photo Sample Set,” and the “Aluminum Sample Set.” Further, since I’m also going to sell straight-up photo prints, I ordered a large, glossy test print, using their “UltraHD Photo Print” method.
The order has arrived. I am deeply impressed. The samples are so gorgeous, I don’t even want to spoil them by experimenting on them! But I will…
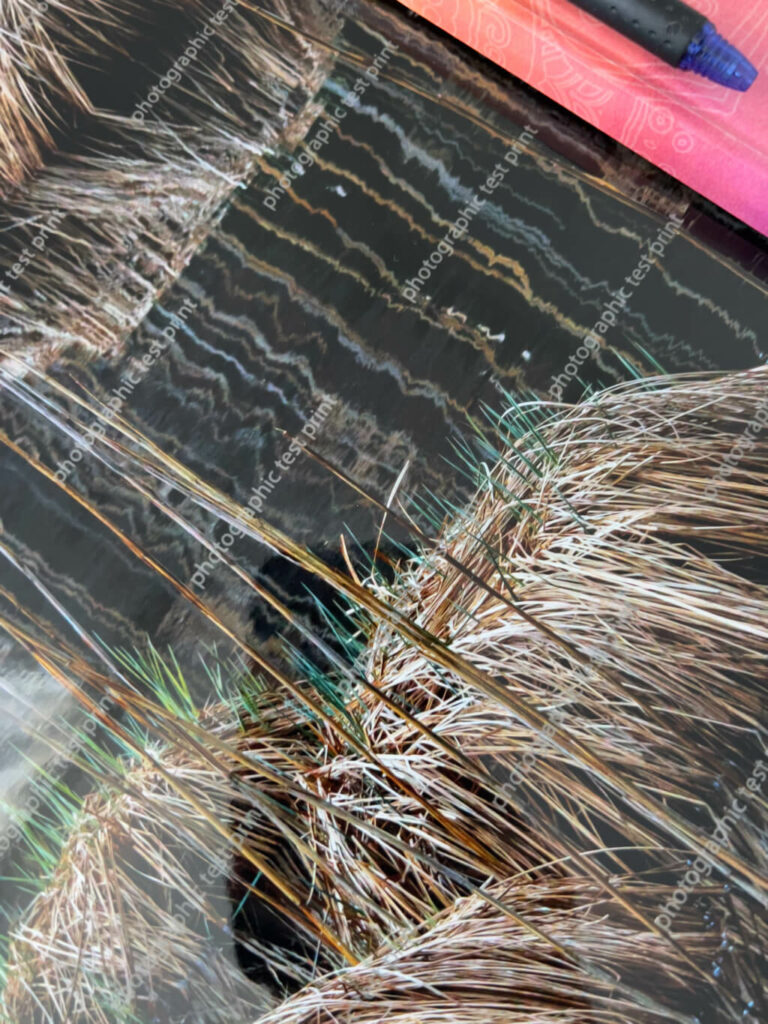
These images are too compressed to do the big, UltraHD test photo print justice—it is AMAZINGLY SHARP.
Choosing Surfaces Suitable for Painting on Photos
While I was waiting for those to arrive, I sent emails to White Wall and Hahnemühle, inquiring about surfaces.
White Wall
I asked for confirmation on White Wall’s most durable paper/aluminum surface combinations, for painting on photos. After describing my intentions, I wrote:
Might any of these surfaces be more suitable? I have selected these because they appear to be coated with a UV protective laminate, or are water-resistant (aluminum) and hangable in bathrooms and rain-sheltered areas.
- Fine Art Print On Aluminum Dibond
- Direct Print On Aluminum Dibond
- ChromaLuxe HD Metal Print (I would rough up the glossy surface, or coat it with a medium, to create a surface that will take pastels)
- Photo Print On Aluminum Backing (Fuji Crystal DP Matte)
- Photo Print On Wood
They promptly replied:
As far as I understand the process correctly, the materials you have chosen are already a very good choice.
Especially the Fine Art on Alu Dibond offers you a clean surface to apply colour etc. to the picture afterwards.
We use Hahnemühle and Canson papers for the Fine Art print on Alu Dibond.
With direct printing on Alu Dibond, you also have a rough surface that can be easily processed with colours.
HD Metal is a very smooth surface, as you correctly say. To be honest, we have hardly any experience with post-processing by artists here, which is why an experiment on your part would be appropriate.
Feel free to share your results with us, we are curious about the reactions of our products. Here’s a discount code. [Yay!]
Since I’ve used their papers in the past, I decided to focus on…
Hahnemühle
I wrote to Hahnemühle, describing how I historically work with pastels. Then, I inquired which of the Hahnemühle papers, used by White Wall, might work best for wet and dry media over printed photographs. They also promptly replied:
Everything that White Wall has recommended are Digital Fine Art ink jet papers. All are suitable for your prints, but I would recommend choosing Fine Art Baryta for really dark/black prints, because of the whiteness.
Regarding the matte papers, it is more likely a sense of your own taste. The William Turner has a unique structure, the Torchon has much less structure, and the Photo Rag® is a smooth paper.
Nevertheless, we do not have any experience with painting on prints, so we are not able to give any recommendations here.
Also take a look at our brand new Hahnemühle App with a large knowledge database about fine art printing with Hahnemühle paper.
Methods for Painting on Photos
Curious about how to approach my experiments, I investigated methods for painting on photos using soft pastels, my preferred medium. (I may eventually also try oil pastels, wax encaustic, acrylic paints, oil paints, and/or inks and stains.)
Like everything, soft (chalk) pastel has its pluses and minuses. Pastels consist of pigment, combined with the minimal amount of binder needed to hold the pigment together. Since there is no “carrier” medium (oil, acrylic, wax, etc.), pastels provide rich, bright colors, which is one reason why I prefer them. Painting with pastels avoids problems like cracked surfaces (oils, especially if you don’t paint fat over lean), yellowing (oils, waxes), or the uncertainty of colors drying darker (acrylics). The downside is that with most pastel techniques, the final work needs to be framed under glass to avoid smudging, usually even when it is sprayed with fixative.
Unfortunately, I found a lot of information about using everything except pastels to paint on photographs. But two helpful articles finally surfaced. [NOTE: I often save offline copies of the most useful reference articles I find on the web. This is because over time they tend to disappear. You might consider doing the same.]
Pastels and Gesso
First, I came across this interesting post, a Soft Pastel and Clear Gesso Technique, by Cory Goulet. An abstract pastel and mixed media artist, Goulet describes using clear gesso with a heat gun, to create a textured and toothy surface that accepts layers of pastels nicely. You can layer more gesso, pastel and fixative, and end up with a pigment-holding surface that may not need glass. I have to try it.
A Chapter on Hand-coloring Digital Prints
Second, I found an entire chapter on Handcoloring using water, oil or chalk as a base, from the book New Dimensions in Photo Processes. The section on “Chalk-based methods for hand-coloring digital prints” includes information on safety, materials and methods. Safety is a consideration with any media, and pastels are no exception. Pastel dust has what can be described as little barbs (like a fishhook), and once it lodges in your lungs, it’s probably not coming out.
Stev’nn Hall
I should also mention discovering the art of Stev’nn Hall, whose web site unfortunately doesn’t seem to be working. However, I did find this article, which said:
“To create these works, Hall begins by taking photographs, combining upwards of 40 digital images per piece into a single, comprehensive panoramic view, anchored by a definitive horizon line. Once the image is created in the computer, he prints it and mounts it on birch panel. That’s when the piece really begins to come alive: Hall embellishes the image, painting, scratching, and applying stains, oil paint, pastel, and ink.”
That’s all I’ve learned about his methods for painting on photos. Nonetheless, it’s food for thought.
Selecting a Clear Gesso
Next was determining the best gesso; neither too thick, glossy, or cloudy. Cory Goulet prefers Liquitex, but I wasn’t happy with its apparent milky tone, judging by her in-process photos (I could be wrong). Since I am going to be using the gesso over photographs that I still want partly visible, I need a medium that will be as clear as possible. After reading about several of the better known brands, and their “clear” or “transparent” gessoes, I narrowed my options down to three:
- Winsor & Newton Artists’ Acrylic Clear Gesso
- Art Spectrum Supertooth Colourfix Pastel Primer
- Liquitex Clear Gesso
In the end, I settled on Winsor and Newton’s Artists’ Acrylic Clear Gesso, which they describe as, “completely clear when dry.” Jerry’s Artarama had this to say about it:
Offers excellent tooth for great paint adhesion, fast drying, with a balanced absorbency. The Clear Gesso is exactly that: clear, not milky like some other “clear” gessoes. It can be tinted with acrylics to add some color to your primer or used alone to allow the qualities of your canvas or board to show through. Non-yellowing, flexible, and with all the tooth, absorbency, and fast-drying properties you need. The unpigmented Artists’ Acrylic resin base dries absolutely transparent. Perfect for acrylics, oils, and alkyds, it also makes an excellent ground for charcoals or pastels.
Sold.
Other Supplies for Painting on Photos
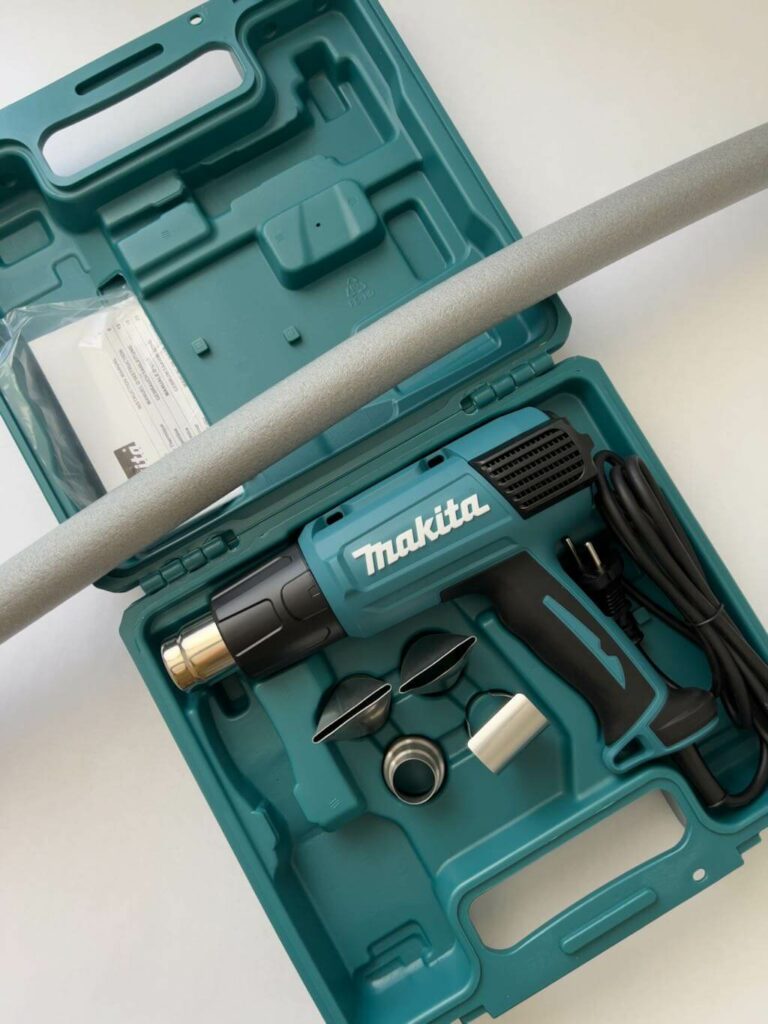
Then came investigating and deciding on a good, large brush for smooth gesso application (hopefully with no lost hairs left behind), procuring the right sandpaper grits to scuff surfaces, and selecting an appropriate heat gun with variable temperatures. Here’s what I ended up getting:
- Sandpaper in grits 120, 180 and 240, for sanding surfaces to various smoothnesses
- A Makita HG6031VK Variable Temperature Heat Gun
- A da Vinci Top Acrylic, Series 5040, wide synthetic brush, 80 mm (a little over 3″)
- A sandpaper block
- A tube of foam pipe insulation, for blending pastels
Unfortunately, I had to order everything, since our local, tiny craft store doesn’t carry serious art supplies.
How it All Looks
At this point, everything has finally arrived. I’m both excited, and intimidated, to start my experiments.
Each of the white-bordered prints shown below is on a different, gorgeous paper. The aluminum sample group is in the upper left, and includes three metallic surfaces that show through the prints, we well as four other surfaces.
My First Experiment Towards Painting on Photos
I have decided to test with the Hahnemühle fine art giclée prints first, then move on to the AluDibond.
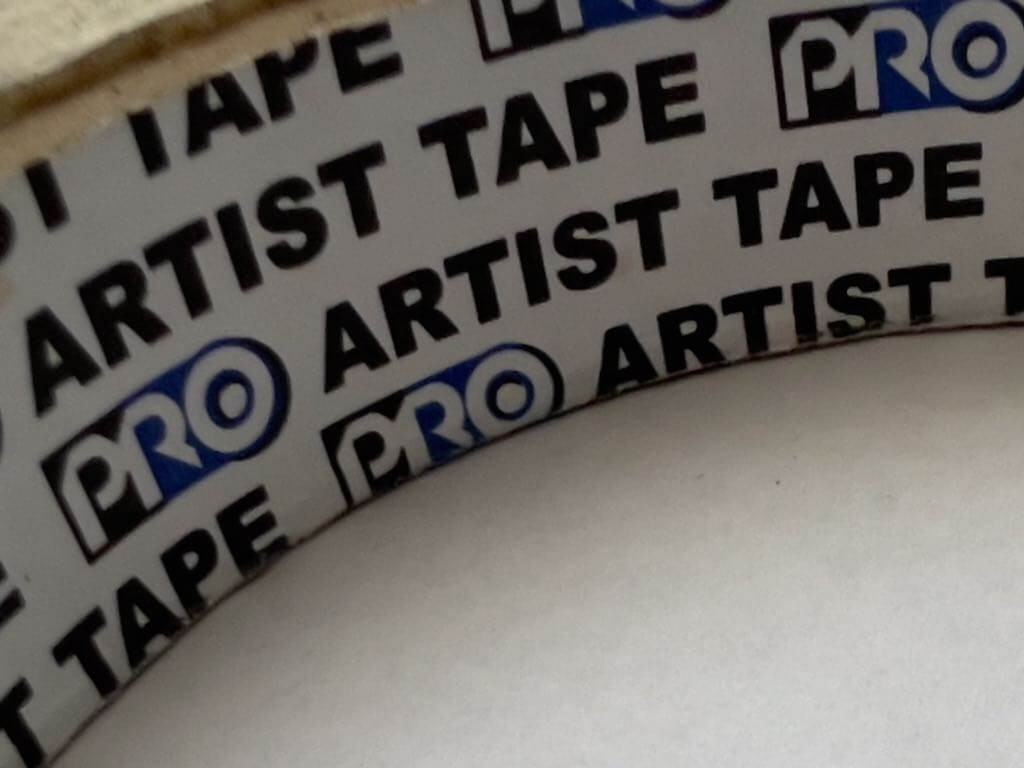
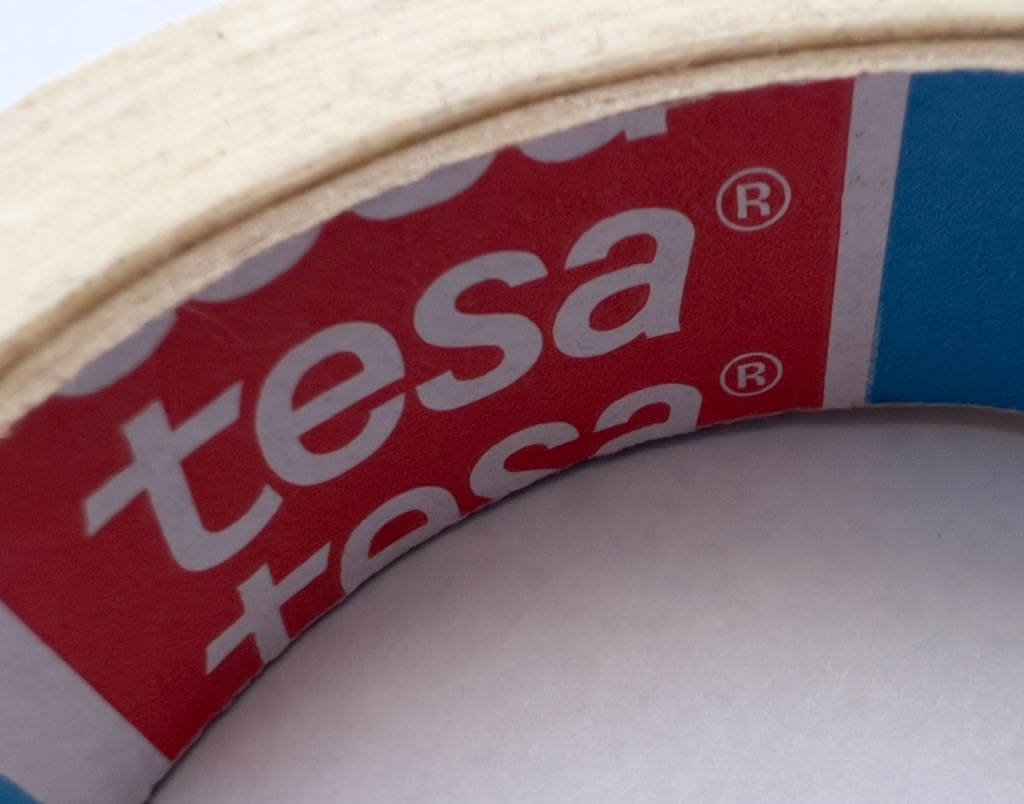
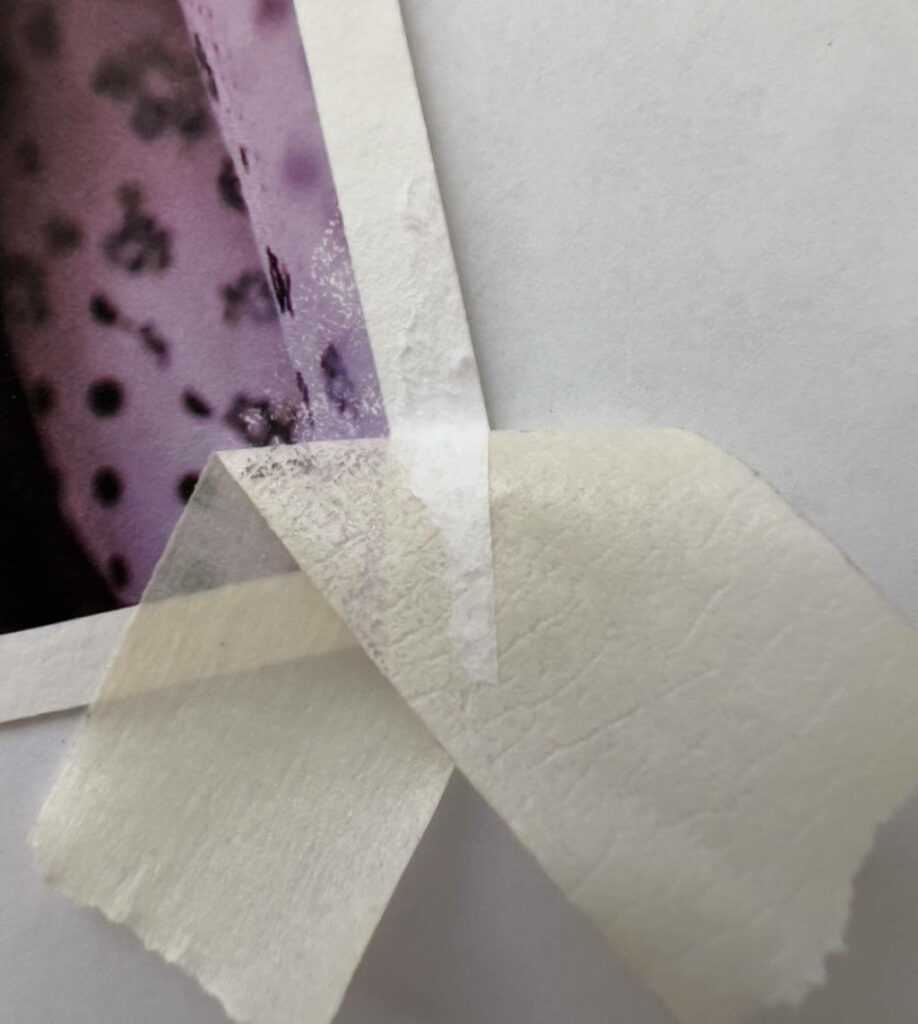
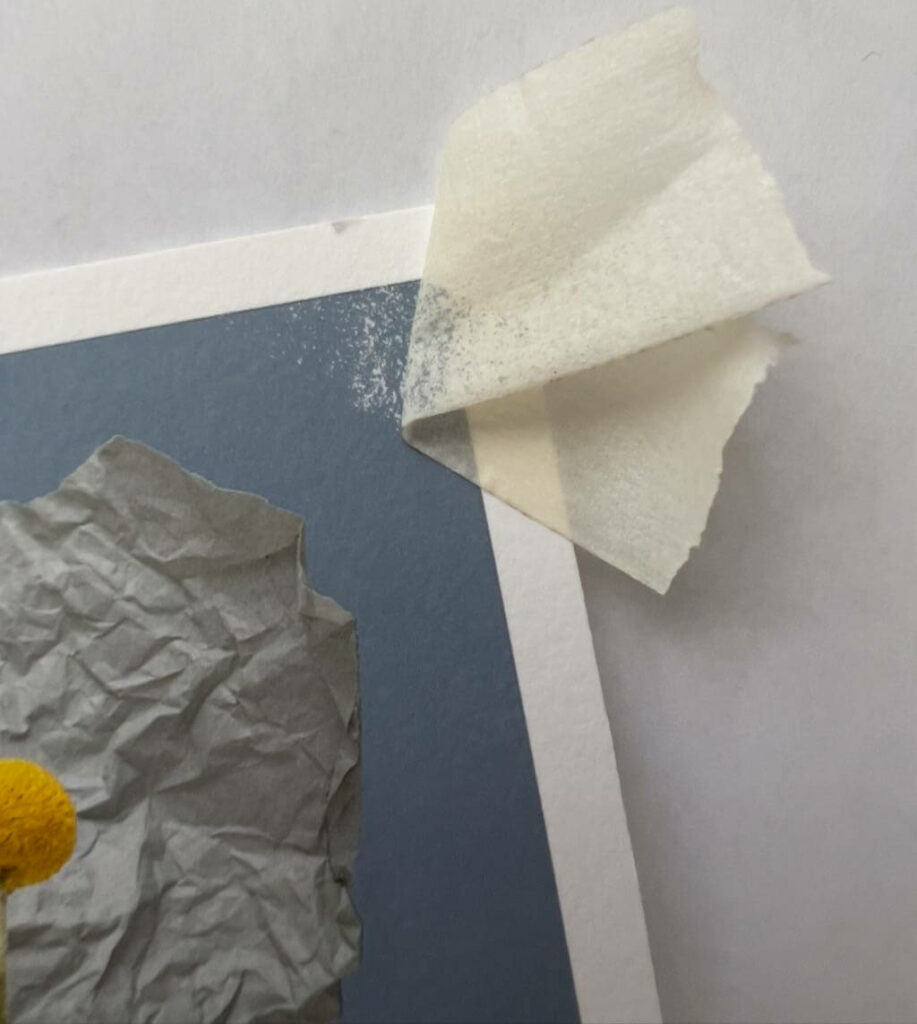
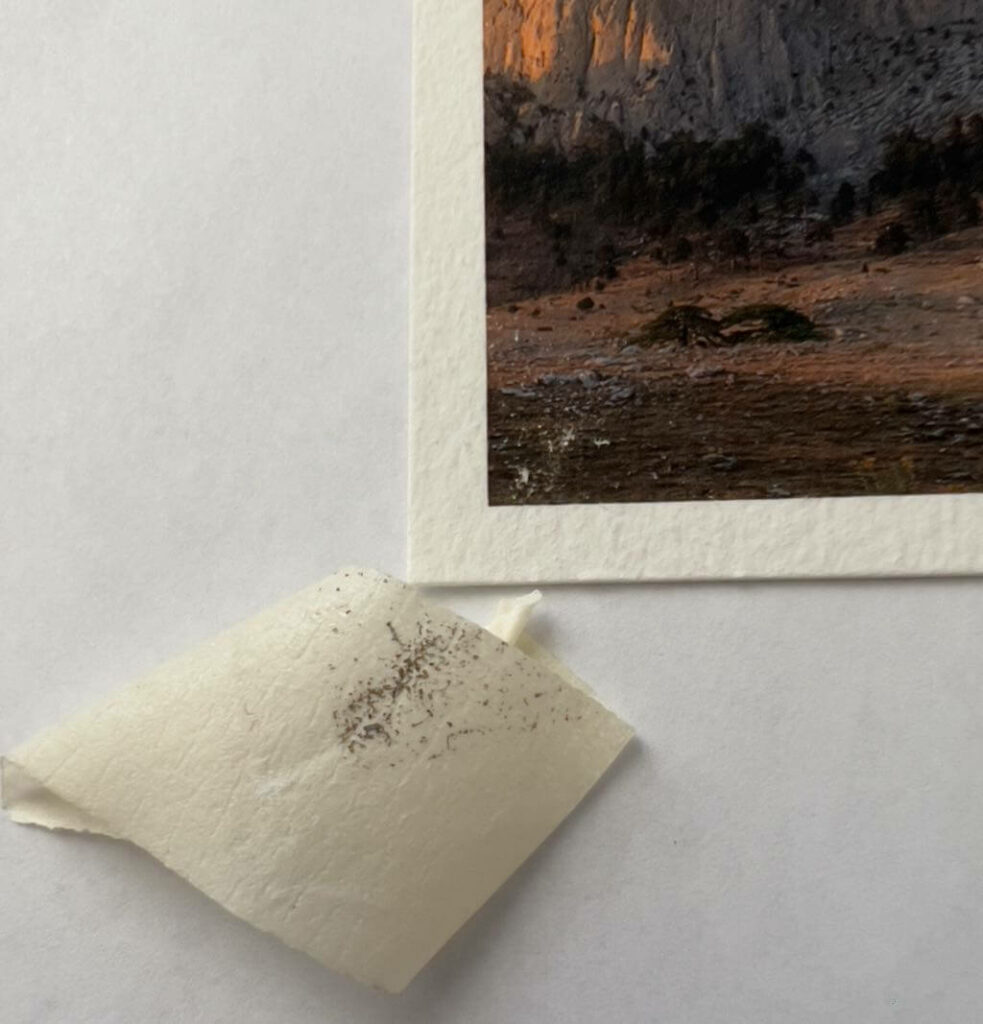
My first experiment was taking two types of tape—”Pro” brand Artist Tape, and a Tesa tape that’s either masking or painter’s—and seeing how they behave on the prints and paper.
The Results Weren’t Great
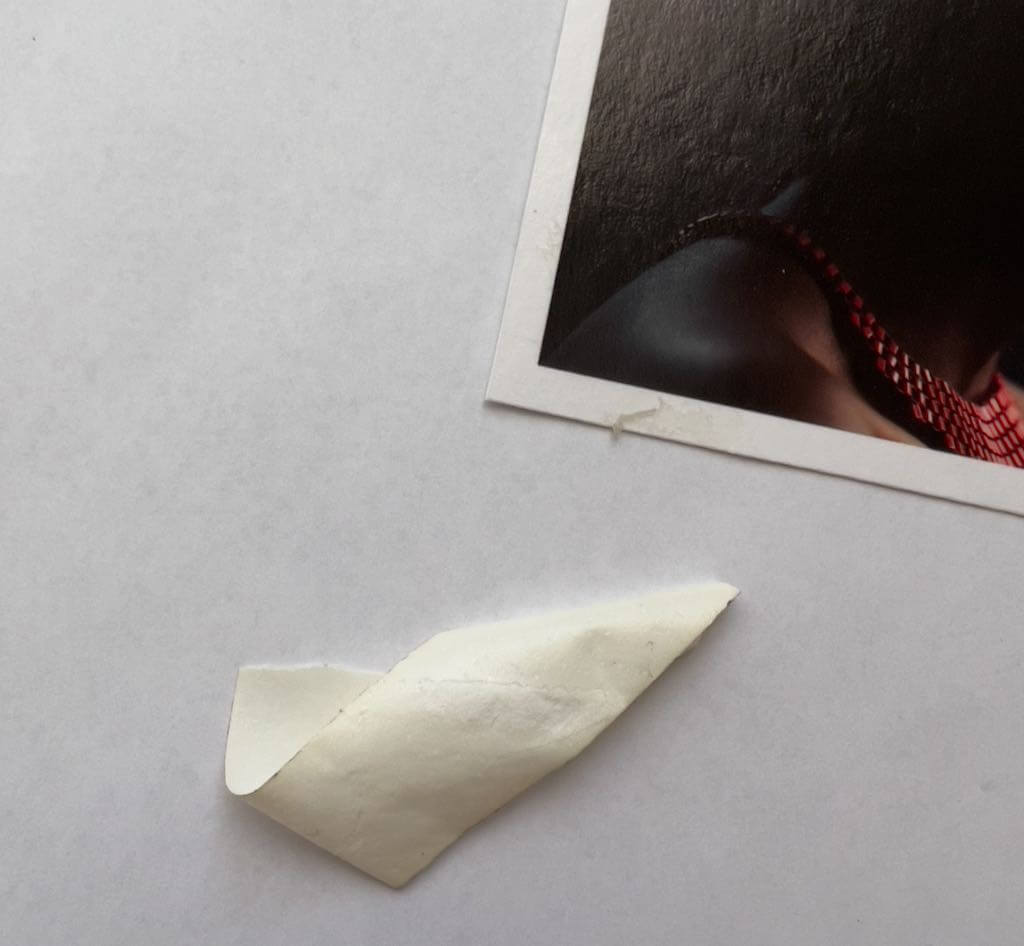
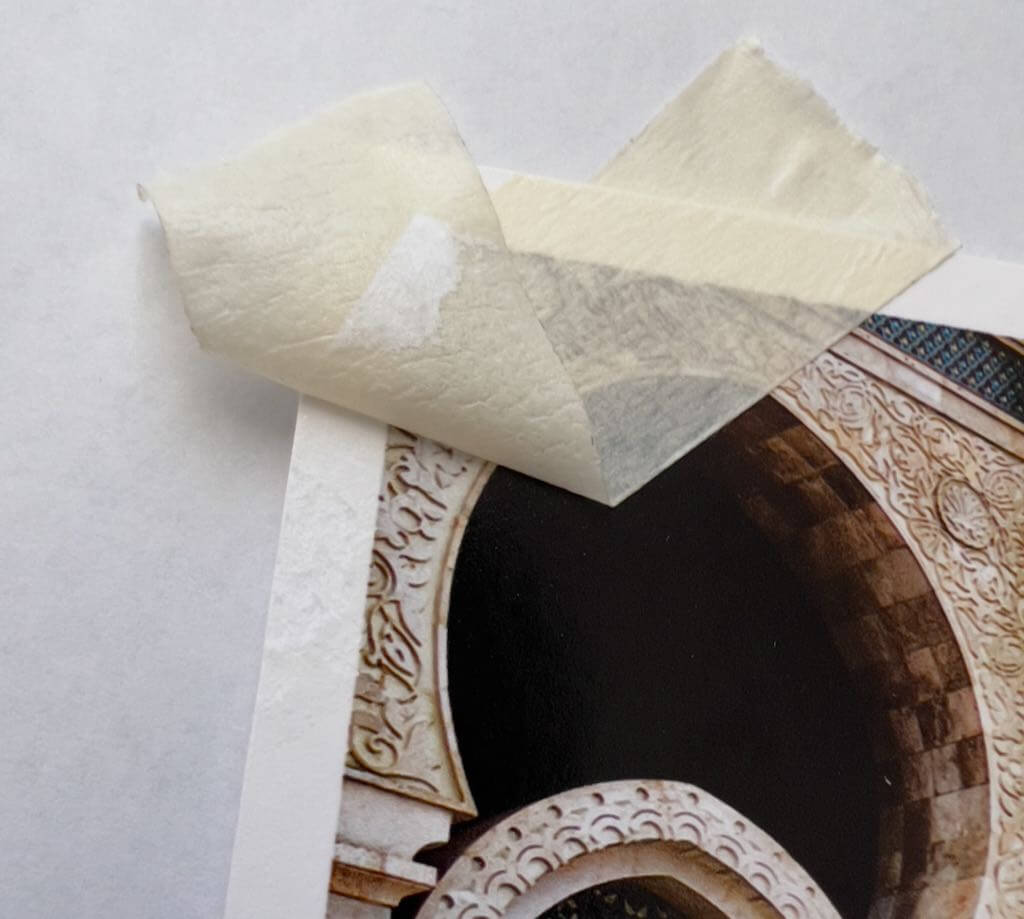
I pressed the tapes on firmly in each test. The “Pro Artist Tape” left a very gummy adhesive residue on the Hahnemühle Baryta. It was impossible to remove. However, it didn’t pull up pigment or paper after firmly sticking for a short time, though I had to peel it off very carefully. Similarly, the Tesa tape left residue too, but less, and still unremovable. Neither pulled up pigment or the paper’s surface, which I am guessing is due to the printed surface.
I tried the Pro on the Hahnemühle Pearl, and it pulled up the paper so badly, it ripped into the image.
After giving up on the Pro tape, the Tesa tape pulled up pigment on all the matte Hahnemühle papers: the Torchon, Photo Rag, and William Turner. (Paper fibers too, in varying degrees.)
Therefore, if I want to mask portions of photos when applying gesso, I will need to find a different tape. Maybe mine were old or cheap, I’ve had them a while. It’s also possible that all tapes will pull pigment off matte fine art photographic prints.

Bottom Line Regarding Tape
The three matte papers—Torchon, Photo Rag, and William Turner—probably shouldn’t be used with tape. This is not a condemnation of them, though, it’s just tape!
Only the gently glossy Hahnemühle Baryta didn’t lose paper or pigment with either tape, but both tapes left adhesive residue on the unprinted paper border.
The second most durable print surface, tape-wise, appears to be the Hahnemühle Pearl. With its pearlescent coating, it didn’t lose pigment with the Tesa, but did retain adhesive on the border, and some of the border paper pulled up.
As of this writing, here are more details on the fine art giclée papers used by White Wall (scroll down).
Ta da! 😆 I know it’s not a lot of actual experimenting, but all the product research and procurement took time. (We were also away on vacation for 12 days.)
There’s still much to do. This week I will try more tests, and report back on my blog soon.
Thanks for your time and attention, both are valuable. 🙏🏻
I invite you to view my photographs and paintings, and to learn more about me.
If you liked this post, you have options:
- Check out the art available in my shop!
- Buy me a coffee (I’d be so grateful!), or check out my Patreon (coming soon!).
- Sign up for my monthly newsletter, full of delicious tidbits.
- Follow my blog with RSS, using a feed reader like Feedly.
- Browse my other blog posts.
©Marlene Breitenstein. I welcome your inquiries about purchasing, licensing, or republishing my work. I take my intellectual property seriously. This post and its contents, unless otherwise noted, is owned by Marlene Breitenstein. It is not to be reproduced, copied, or published in derivative, without permission from the artist.
[Updated on July 19, 2023, to add a little more detail to the tape experiment results.]


