

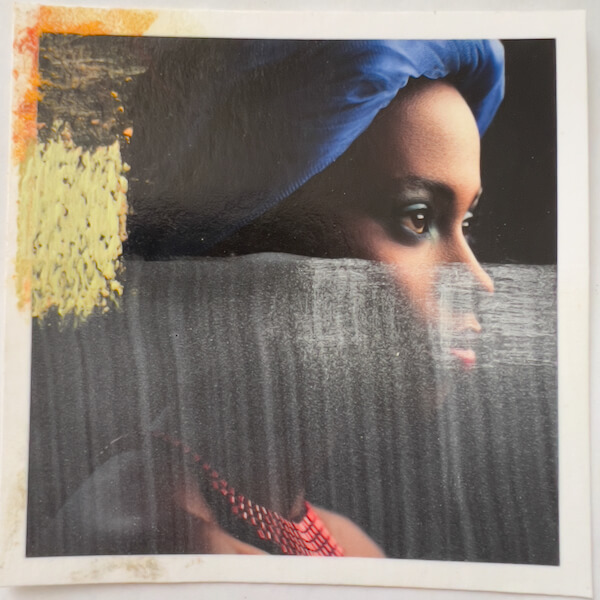
Moving right along, I’m ready for the next stage of experimenting. (If you haven’t read them, here’s Part One and Part Two of this process.)
Today, I’ll be applying a clear gesso on photographs, to gauge its transparency. Next, I’ll see how the gesso behaves with soft pastels. Finally, I’ll learn what happens when I texture the gesso with a heat gun.
I’m continuing with the five Hahnemühle Giclée photo samples I procured from White Wall: Baryta, FineArt Pearl, Torchon, Photo Rag and William Turner. Further, I cut a square corner out of my much thinner UltraHD glossy sample print, to test as well. How will it hold up to heat?
Experiment Plan for Painting on Photos
As a refresher, here’s the overall plan. I’ve already completed steps one through three.
Direct dry pastel application in five layers, from hardest to softest pastels.Another direct application in five layers, using only the softest pastels.Applying the softest pastel layers with fixative, for a little tooth.- Applying Winsor & Newton Artists’ Acrylic Clear Gesso smoothly, to gauge effect alone.
- Testing the gesso with layers of pastels.
- Applying the gesso with the heat gun, to create texture.
- Testing the textured gesso with pastels.
- Layering gesso and pastels, with fixative.
- What happens if I finish the painting with a layer of gesso?
#4: Experimenting with Applying Clear Gesso to the Photos
Previously, I read about a number of top brand “clear” and “transparent” gessoes, and settled on Winsor & Newton Artists’ Acrylic Clear Gesso. On its promotional material and the product label itself, W&N states this gesso is “completely clear when dry.” Naturally, transparency is important to me, so the photo shows through the gesso with minimal change.
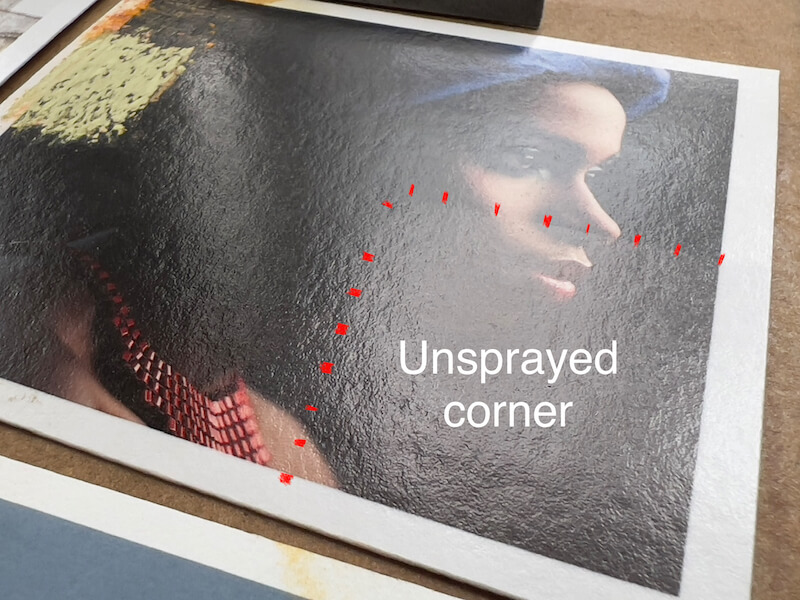
However, concerned that the sample Giclée prints might be damaged by applying a wet medium, I decided to spray them with the Schmincke pastel fixative first. As a “control,” I left a corner of each unsprayed to see if it reacted poorly. (Granted, the fixative is wet too, but it’s not being applied with a brush that could push pigment around.)
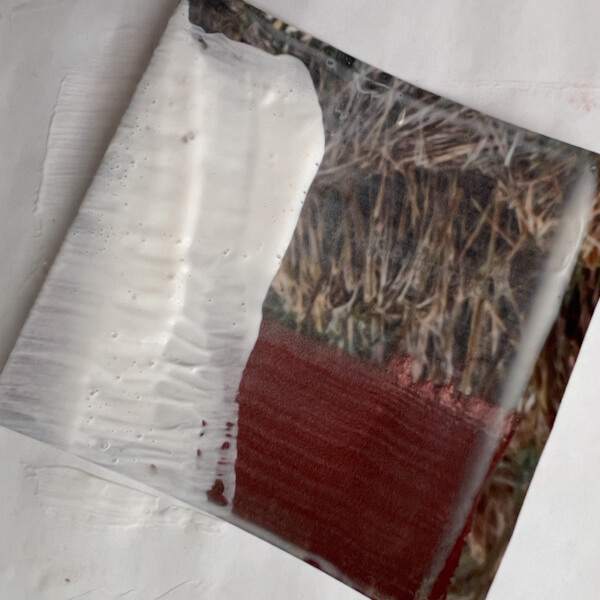
Wet
Here’s how the gesso looks, shortly after being applied:

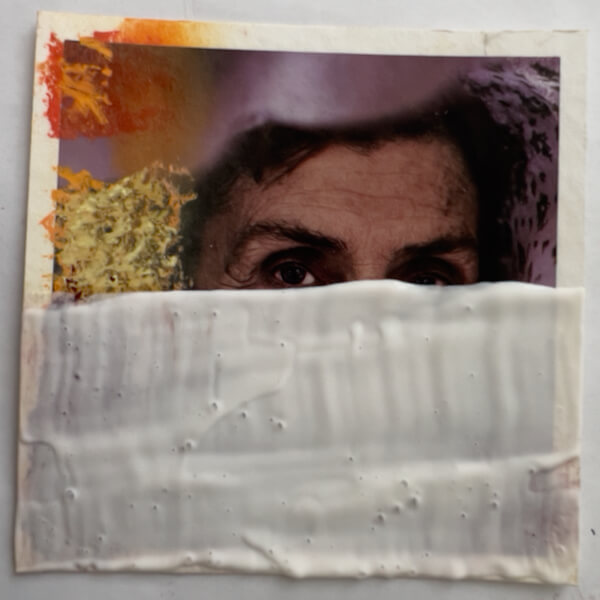
Dry
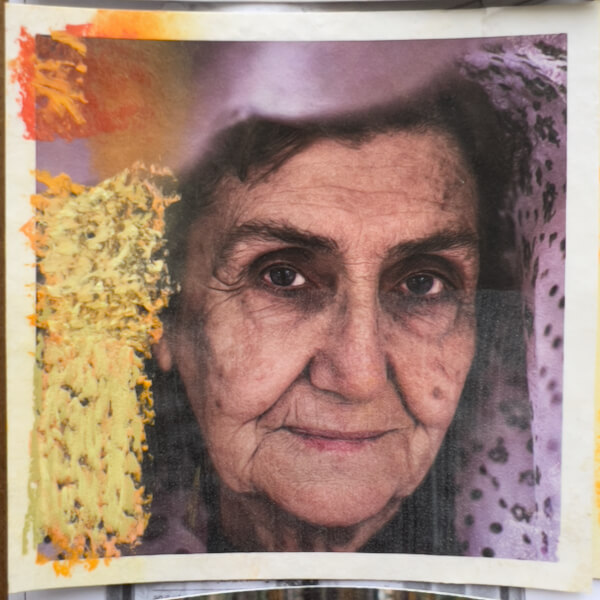
AARGH! Here’s how the gesso appears, after drying overnight. Needless to say, I’m not terribly happy with four of the six results.
See big
Experiment winner!
See big
Another experiment winner!
See big
Meh, so-so.
See big
Oof, not good.
See big
Waste of an expensive print.
See big
NO WAY.
As you can see, Winsor & Newton’s repeated claim of “completely clear when dry” isn’t quite accurate.

Takeaways
- On the plus side, the W&N Clear Gesso creates a toothy, matte finish, which should be great for grabbing and holding numerous layers of chalk pastels. In this regard, I am positively impressed. No need to mix marble dust or pumice into a wet medium for tooth.
- Because the gesso is matte, all sheens from the glossy surfaces are obscured, rendering them rather pointless when being painted over.
- Fortunately, contrary to how regular ink jet prints bleed and smear when wet (Giclée is a form of ink jet), none of the photographs tested appear to have blurred from the application of the gesso.
Ranking the Papers by Gesso Clarity
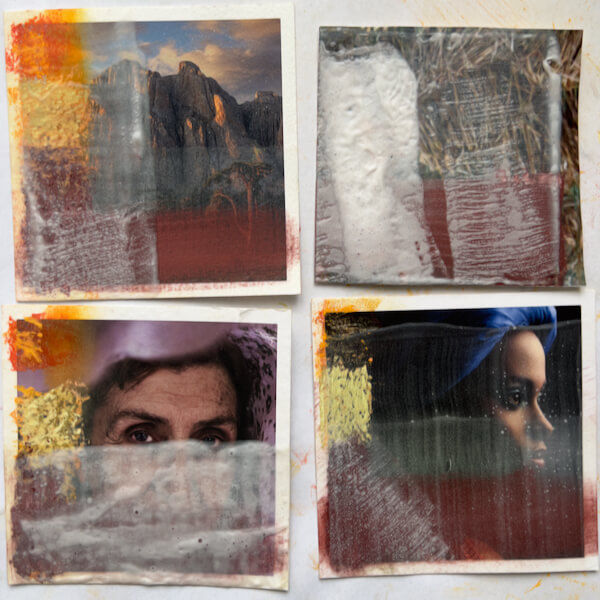
The Winners
See big
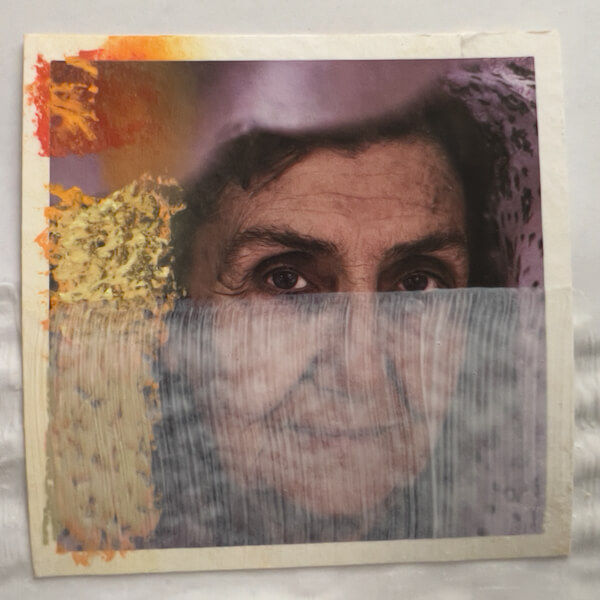
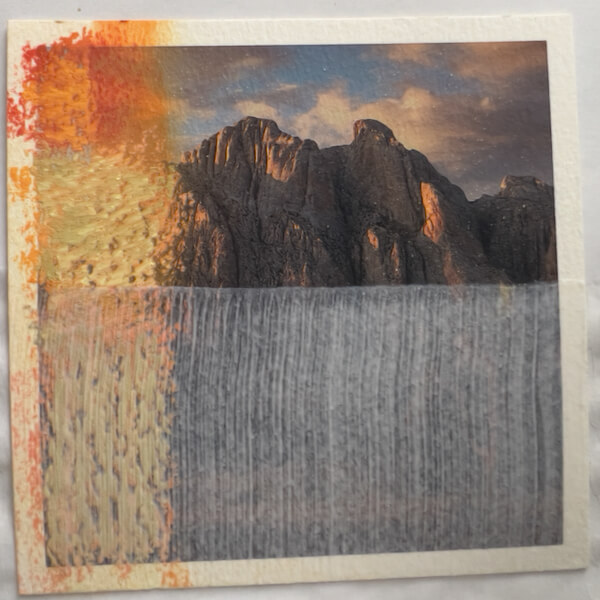
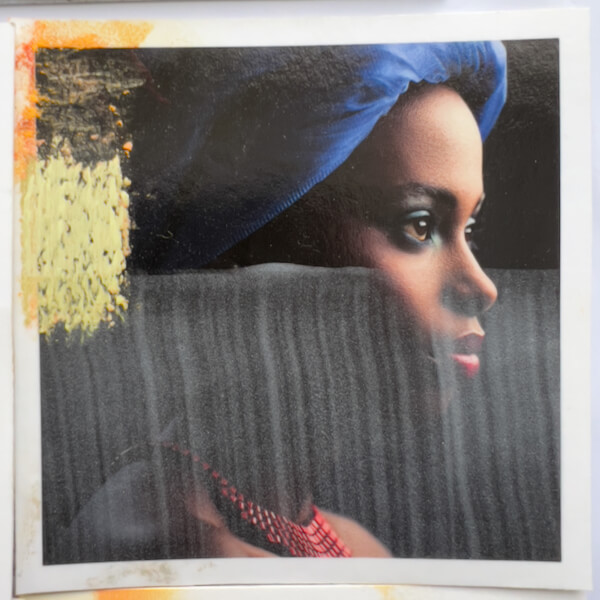
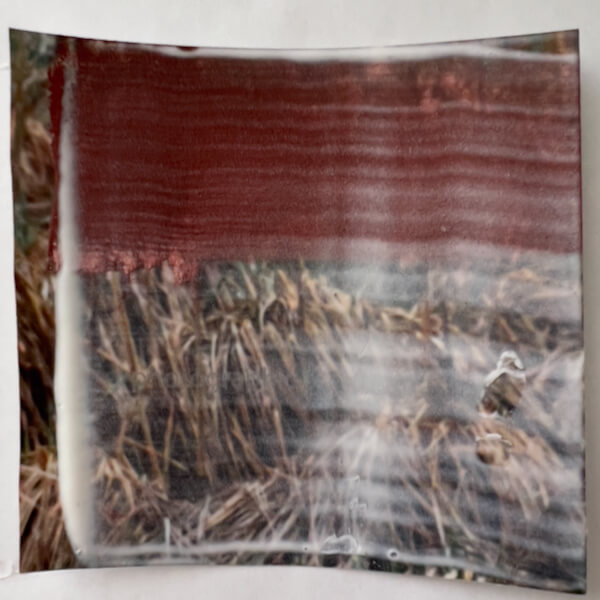
Best for painting on moodier, shadier, or lower-light photos.
See big
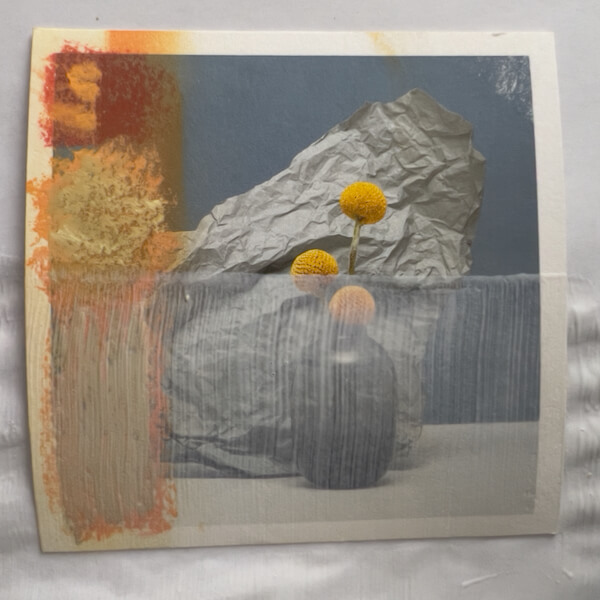
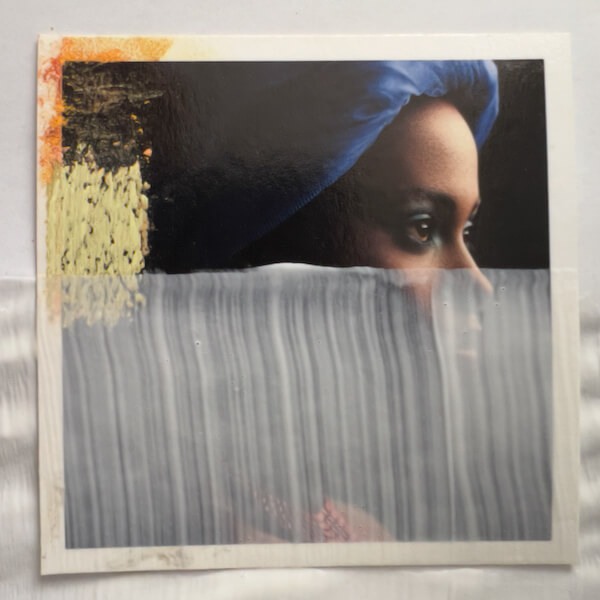
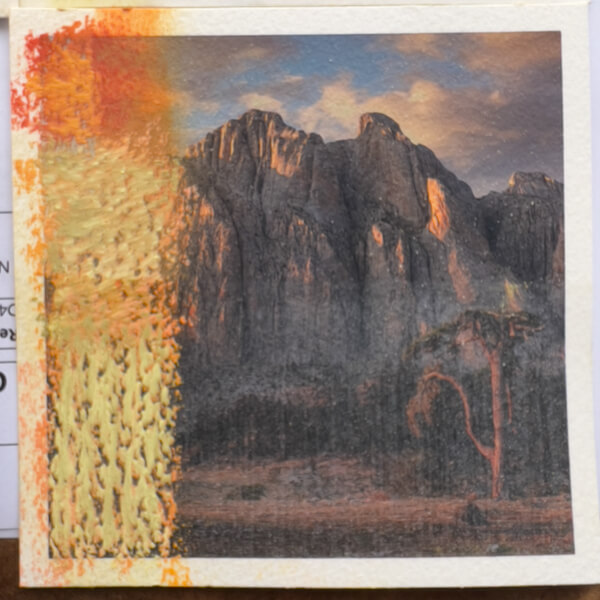
Best for painting on photos that benefit from an inner glow.
- Perhaps the best result of gesso clarity is on the Hahnemühle PhotoRag, an already matte paper, with the smoothest of the matte surfaces in this trial. Luckily, I was already favoring this paper for its relative lack of texture, so I’m really happy that the gesso is nearly clear when applied in a thin layer, only every so slightly darkening and dulling the photograph. Further, if I want to leave parts of a photograph completely untouched, this would be the least noticeable transition between gesso and pure print. The paper itself is not as bright as others, so this should work best for moodier, shadier, or lower-light photographs+paint applications.
- Interestingly, when painted with the W&N Clear Gesso, the Hahnemühle FineArt Pearl retains its merit. The gesso is pretty translucent, with just a hint of dulling, and cloudiness in the darks. While it obscures the surface refraction of the pearlescent finish, the print still looks quite good, with an inner glow. I will also be using this paper for painting on photos, since it’s a great choice when the photograph would benefit from a feeling of refractive light.
The Rest
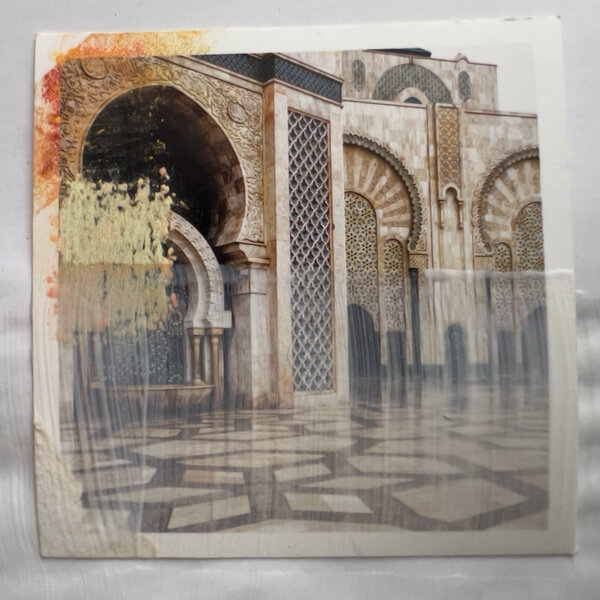
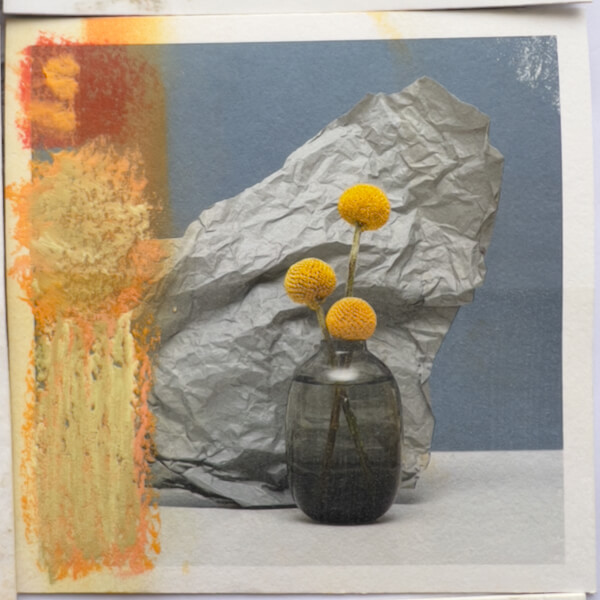
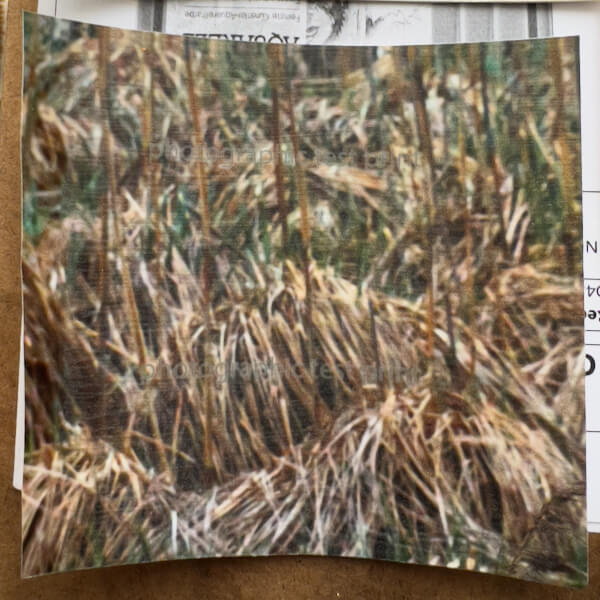
- Next in line is the Hahnemühle Torchon, which didn’t take the gesso badly, but it looks a bit dull and milky, despite the already matte print.
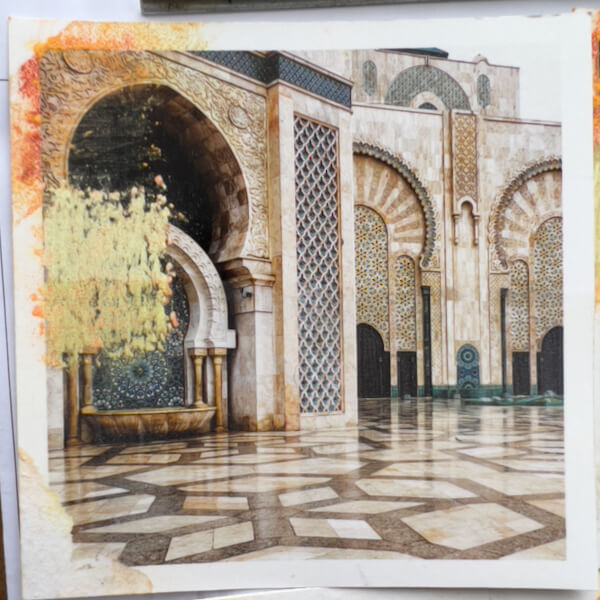
- In this test, it was a tie for the next worst performance of the W&N Clear Gesso. Sadly, the printed image on the William Turner was markedly dulled and obscured by the gesso. Similarly, the UltraHD glossy was muted, and unsurprisingly, for its cost and sharpness, using gesso on it seems a waste. (These two papers and printing methods are really gorgeous, so I’ll also save them for straight-up photo prints that won’t be painted on.)
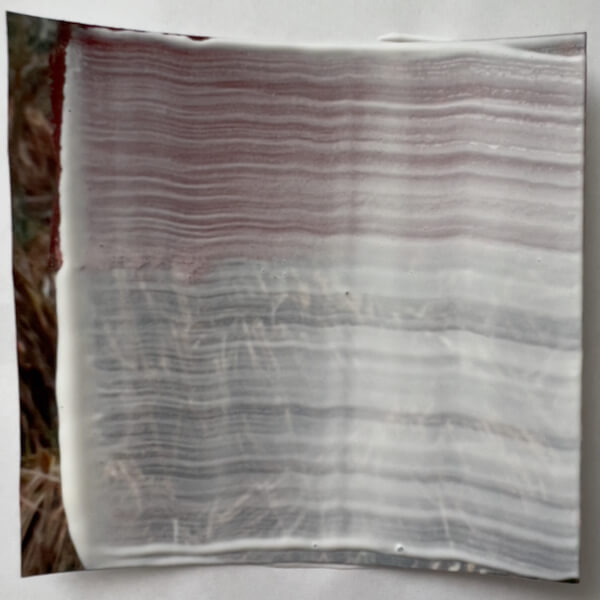
- Regrettably, the gesso performed the worst on the Hahnemühle Baryta, looking the milkiest against the largely dark image. (Would it look similarly cloudy on the other papers, if their images were as dark? Perhaps.) While I won’t use this paper for painting on photos, it’s a lovely paper for dark photographic prints.
Can I Make the Gesso Clearer?
Disappointed that gesso on the Baryta is so milky, I wondered if that would reduce if sanded. Therefore, I filled the sandpaper block with 120 grit paper and sanded a little. First, I tried brushing away the residue. Next, I tried moist-wiping away the residue.
Um, NO, definitely doesn’t help. I suspect a finer grit wouldn’t, either. Why did I think this would work?
#5: Testing Gesso with Pastels
Moving on, I applied five layers of Schmincke pastels, the softest soft pastel, with no fixative between. Here’s how it looked on one of the samples:
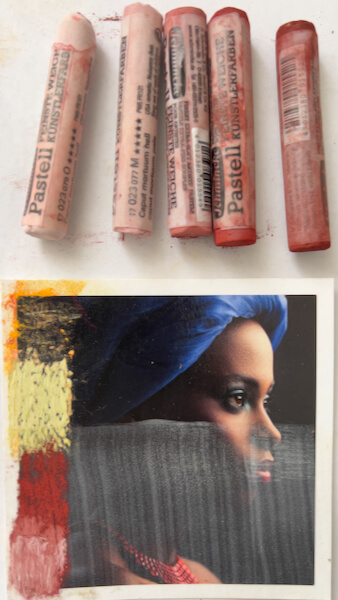
Unfortunately, with no fixative, the fifth layer started smearing.
Takeaways
- The gesso could only take 4 pastel layers.
- I won’t bother testing with fixative, surely that will work as before.
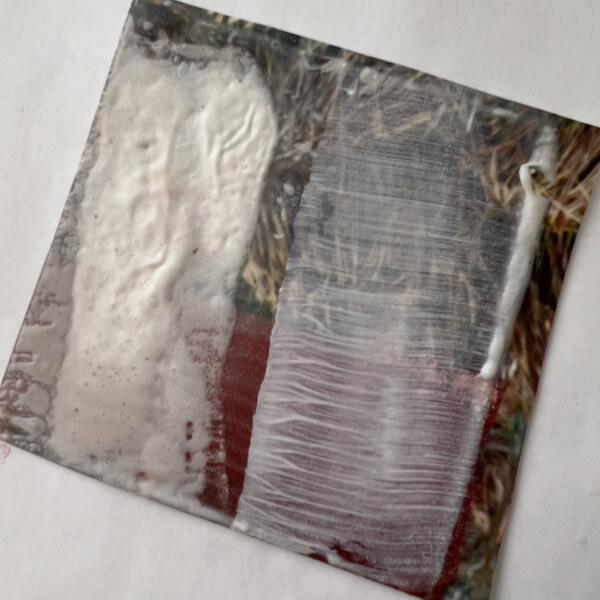
#6: Gesso + Heat Gun = Texture
Now for the trickiest test! I’ve never used a heat gun; this will be interesting. (Don’t try this at home, kids! I’m just blogging about this for my own reference later. Not responsible for the injury of others, etc., etc., yadda, yadda.)
Heat Gun Method
Looking back at Cory Goulet’s instructions, her recommendation for creating texture in the gesso is to (I paraphrase):
- Pour a little gesso into a container. Using a wide brush, gently apply a smooth layer of gesso over the pastel, carefully as to not muddy the gesso or lift the pastel. (Only apply to a small section, and texturize it as described below, before moving on to another section.)
- Keep in mind that the thicker the gesso layer, the more texture, but also the cloudier (Goulet was using Liquitex, but this seems true for Winsor & Newton too, alas).
- Safety
thirdfirst! Know how to operate your heat gun properly and carefully, before proceeding. Be sober. Avoid loose hair, clothing, curtains, and jewelry. DON’T TOUCH THE TIP OF THE GUN WITH ANYTHING! - Start with the heat gun on the lowest temperature setting, and the gesso just applied. Very slowly, sweep the gun over the gesso to texturize as desired (rippling, bubbling). Gradually adjust temperature setting and movement speed, if needed. (I ended up using a higher temperature.)
- When done, cool the heat gun, and cool and fully dry the gesso before adding pastels.
- Flatten buckled paper under a weight, if necessary.
See Goulet’s article, linked above, for more details.
Experimentation Hesitation
Naturally—being the appointed family campfire-maker and fireplace-tender in my youth, then graduating to being a fire dancer, I have an informed respect for heat and fire. (Crazily, I have singed my eyelashes, but not my eyebrows, doing a buzz saw with fire poi.)
Curious? Here I am, performing with two stars on my skirt, black boots, and a ponytail.
(But I digress…)
Back to the experiments at hand, I proceed with caution.
Believe it or not, I’m a little nervous about using a heat gun. I must be doing something right.
“Do one thing every day that scares you.”
— Eleanor Roosevelt
This is how it turned out on the initial round. First, I learned that the lowest heat setting just dries the gesso without texturing it, even if I hold the heat gun still over an area of gesso. Same with heat level number 2. And number 3…
Experimenting Success!
Finally, I turned the heat up to 4. Texturing occurred! However, that was a little too hot, so I lowered the setting to 3.5, which seems perfect for my heat gun.
Takeaways
- The bubbling and rippling from the gesso being heated is an interesting effect. Unfortunately, the gesso was made less clear by heating, where texturing formed. Oh, well.
- This process is a lot slower than I anticipated. For some reason, I envisioned high-force blowing, like a hair dryer, or a torch lighter, but nope.
- As phenomenal as they look, the UltraHD photo prints by White Wall are not great with heat. The emulsion can separate from the thin paper.
- Fortunately, the Hahnemühle Baryta, Torchon and William Turner had no issue with the heat gun; no damage to the image and very minor paper buckling, due to the gesso’s wetness.
- My Makita HG6031V heat gun should be set to 3.5 (out of 9 heat levels), to get the gesso to ripple and bubble.
- Naturally, a thin application of gesso will bubble faster. Bubbles form along lines left by the brush.
- If the brush has left bubbles, they don’t go away with heat. This is a plus, if desired.
- Thick applications of gesso pool more, and ripple and bubble in random ways. Likewise, they are nearly impossible to see through, so should only be used in areas where transparency doesn’t matter.
- Any indentations in the gesso are retained. Accordingly, experimenting with texture could be worthwhile. Try intentionally adding texture before applying heat, to introduce patterns, movement, focal points, etc.
- This should go without saying, but don’t touch the gesso until you are certain it’s dry. Also, once dry, any bigger bubbles can deflate when pushed, so only touch with intention.
Reflection
After waking up the next morning, and having processed some of my emotions from these tests, I have to say I’m really quite disappointed with the overall lack of clarity with the gesso. I feel misled by Winsor & Newton. I was expecting something like a gel medium that dries clear, even when thickly applied. Expectations are dangerous, I know, but W&N set the bar high!
Further, I ordered the gesso directly from Winsor & Newton, so it would be fresh and authentic, to be certain I wasn’t getting an old or fake product. And, of course, thinking I’d be using it for a long time, I ordered the largest size offered, to “save money.”
Of course, I can’t blame the gesso for changing to a white color when heat is applied. That said, the fact that it’s not the “completely clear when dry” it says on the label is really false advertising, in my way of thinking. I may write them a letter to express my disappointment. Bah! Humbug!
Still, I’m really pleased with the fact that a thin coating on two of the papers worked well enough. Again, I’ve learned a lot from this round of experimenting.
What’s Next?
Fun! I’ll be with layering pastels and gesso, to see what painting on the surface is like, and to play more with texturing in a thoughtful, purposeful manner. Stay tuned for the last installment!
Thanks for your time and attention, both are valuable. 🙏🏻
I invite you to view my photographs and paintings, and to learn more about me.
If you liked this post, you have options:
- Check out the art available in my shop!
- Buy me a coffee (I’d be so grateful!), or check out my Patreon (coming soon!).
- Sign up for my monthly newsletter, full of delicious tidbits.
- Follow my blog with RSS, using a feed reader like Feedly.
- Browse my other blog posts.
©Marlene Breitenstein. I welcome your inquiries about purchasing, licensing, or republishing my work. I take my intellectual property seriously. This post and its contents, unless otherwise noted, is owned by Marlene Breitenstein. It is not to be reproduced, copied, or published in derivative, without permission from the artist.